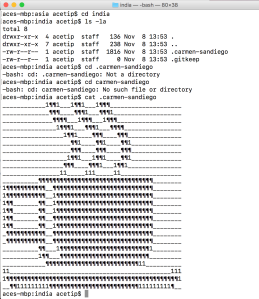
Since the beginning of the TechHire—Open Code vestibule, I have been learning the basics of Java applied in the Processing IDE. For our second coding assignment, with the help of Zein, I decided to create a screen that shows rain pouring. As I’ve documented in previous blog posts, creating this image was no simple feat. I spent days trying to get objects to move on the screen and improve my coding. Just in the context of this one sketch, I learned something new each hour. Even when I was away from the processing IDE, I had my pen and paper to trying to figure out improvements.

Picture notes

Goals for project
For our final project we were given a ‘prompt’ that really just gave us free range to create what we wanted. I was lucky for fluidity of this assignment, because I knew I wanted to continue working on this ‘RainPouring’ project. I mapped out my ideas on paper and tried to bring them to life.
The first task I wanted to accomplish was finding a way to have an umbrella on the screen without having to write so many shapes, which took up many lines of code. Again I find myself giving credit to Daniel Shiffman, because he taught me how to add images to my canvas. The first image I placed on the canvas was of an umbrella against a white background. This royally messed up my vision because it was an ugly box in the center of my background. I soon learned that there is more than one version of an image file. I needed to ditch jPEGs and find myself a PNG. PNGs preserve the transparency behind an image; I didn’t have to worry about a background. Lines 7 through 16 show where I declared and initialized the images I wanted for my project. Now that I had the image on the screen, I wanted to be able to do something with the umbrella. I learned that images work a lot like the familiar primitive rectangle. Lines 35 and 36 show where I call and use the image() function. By setting the image coordinated to the x coordinate to the mouse’s location (mouseX) I could make the umbrella move side to side. I didn’t want the umbrella to move up and down so I kept the y-coordinate at a constant.
</pre>
Droptop[] rDrop = new Droptop[400]; /*instead of two sepearate objects,
i can use on line of coding with an array. An array is a list. '[2]' represents the
number of spaces in the index. in coding, counting starts from the number zero to account for the index.*/
Star[] twink = new Star[300];
int screen = 0; //creates global variable for screen
PImage umpic; //here is where I declared the umbrella image
PImage tweetpic; //here is where I declared a bird image
void setup() {
size (800, 600);
umpic = loadImage("yellow0.png"); //I loaded the image in setup as oppesed to draw
//used a png. file to preserve transparency
tweetpic = loadImage("tweet.png");
for (int i = 0; i < rDrop.length; i++) { //i can use rDrop.length because it will represent the length of the strong (or how many spots are listed in the array"
rDrop[i] = new Droptop();
}
for (int i = 0; i < twink.length; i++) { //i can use rDrop.length because it will represent the length of the strong (or how many spots are listed in the array"
twink[i] = new Star();
}
}
void draw () {
//=======gloomy sunday=====
if(screen == 0){ //The following code is for a the starting rain screen
//lines 19-21 are where we initialize the array within a loop
background(48, 88, 155);
imageMode(CENTER);
image(umpic, mouseX, 400, 291/2, 300/2 ); //picture of umbrella; follows the mouse along the x-axis, width and heighe/2
for (int i = 0; i < rDrop.length; i++) {
rDrop[i].display();
rDrop[i].move();
}
//clouds
fill(187, 189, 191);
noStroke();
ellipse(25, 0, 150, 150);
ellipse(75, 50, 100, 100);
ellipse(150, 0, 125, 125);
ellipse(775, 0, 150, 150);
ellipse(725, 50, 100, 100);
ellipse(675, 0, 125, 125);
/*order is still very crucial in the function of my code*/
}//close screen 0
//=======sunny side no eggs =========
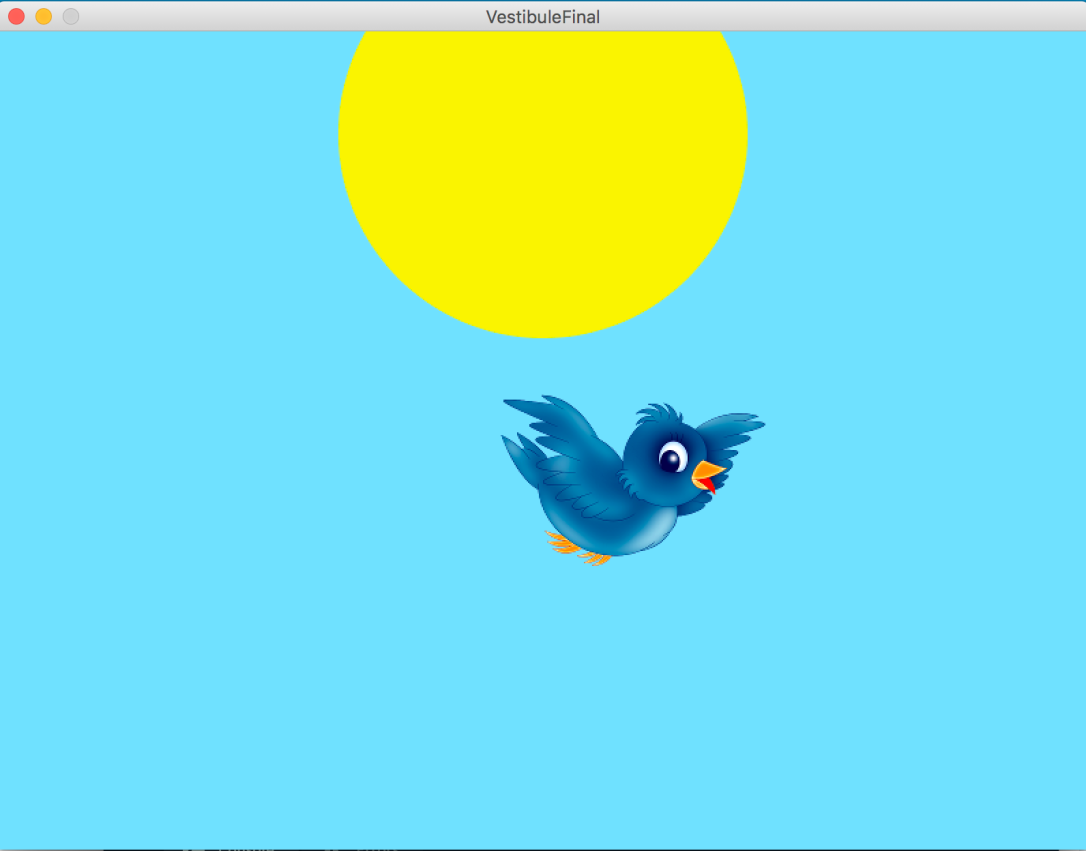
if(screen==1){ //this opens the second screen
background(139,223,255);
fill(250,243,28);
ellipse(400,75,300,300);
imageMode(CENTER);
image(tweetpic, mouseX, mouseY, 400/2, 400/2); //picture of bird; follows the mouse along the x-axis, width and heighe/2
}
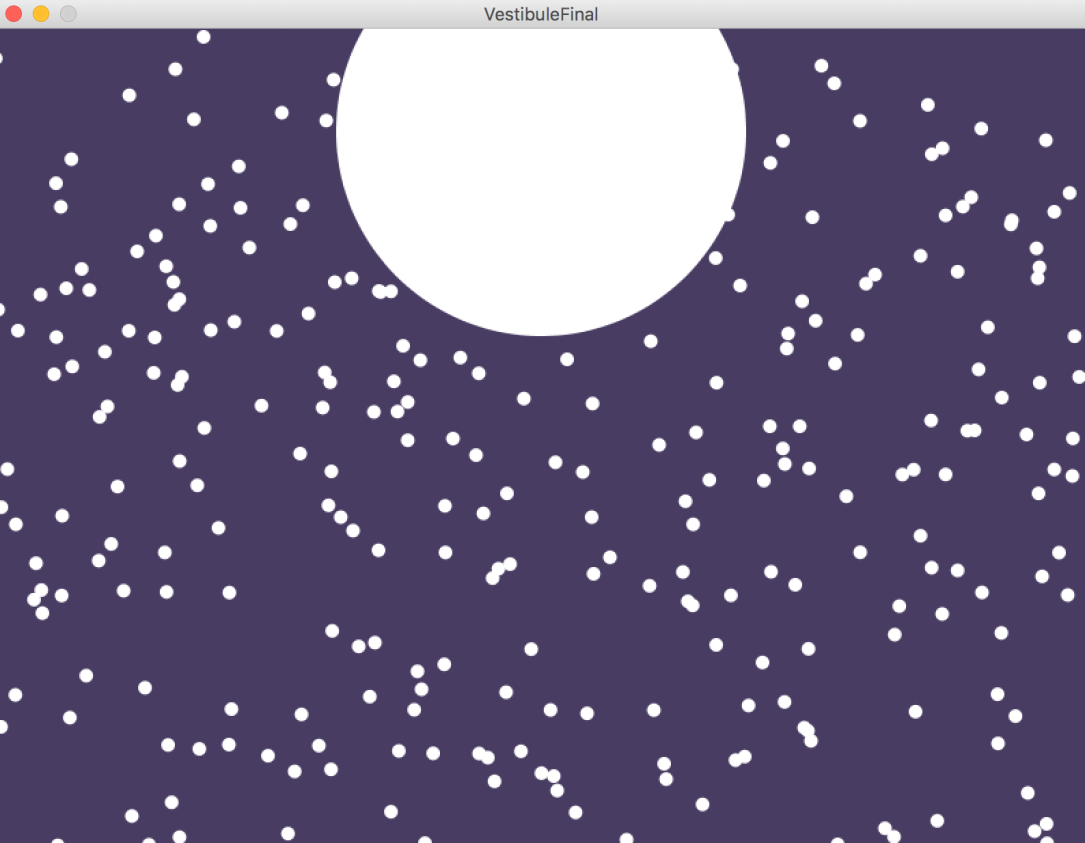
if(screen==2){ //this opens the second screen
background(71,61,95);
fill(209,207,204);
for (int i = 0; i < twink.length; i++) {
twink[i].display();
}
ellipse(400,75,300,300);
}
}//close draw
void mouseClicked(){
background(255); //background flashes white to represent thunder
if ((mouseX >= 0 && mouseX<= 225 && mouseY>= 0 && mouseY<= 150))
screen= 1; //if the clouds are pressed it goes to sun screen
else if((mouseX>=600 && mouseX<=800 && mouseY>= 0 && mouseY<=150))
screen= 2;//if clouds are pressed it goes to sun screen
}
<pre>
The second change I wanted to give my project was to be able to change the weather from rainy to sunny. To do this I added a mousePressed() function. I wanted to be able to press a place on the screen and have the weather change. I chose to say that if I clicked the clouds something would happen. Lines 81-87 show the additions I had to make. In order to do this, I had to find the area that clouds covered on my canvas. I set parameters in the clouds that said if the mouse were pressed there something would happen. I knew I wanted it to be sunny, but the almighty question was ‘how’! After watching coding tutorials by professional coders on how to make complicated games, I began to get a grasp of the basics. It to me well over three hours to grasp these basics, but it did! I had to set up another screen. I created an int named ‘screen’ and assigned it the value 0. This can be seen in line 7. I had to then add this scene change to my if conditional statements. After each parameter of the where the mouse has to be pressed, I put ‘scene==1’ or ‘scene==2’. After learning how to do this, I got excited and decided to make two scenes! (Mind you, it’s now 9am)
Now that I had a new scene, I needed to decorate it. This wasn’t particularly difficult because I know how to create backgrounds and shapes. When it came down to actually writing the code, I had A LOT of difficulty. How to say this information is for one scene and this information is for another scene? If statements to the rescue! Lines 30-54 show my answer to this problem. I could place the information of a particular statement inside of an if statement that was specific to a certain scene. ‘If in scene 0, perform this. If in scene 2, perform that’. My first scene had the rain pouring and a moving umbrella. With the second scene I was able to make it turn into night where I had a moon and stars.

Below you can see the two classes I made, each has its own tab on Processing.
RainDrops:
class Droptop{
color c;
float xpos;
float ypos;
float diam1;
float diam2;
float yspeed;

Droptop() {
c = color(99,196,240,85);
xpos = random(width);
ypos = 0;
diam1 = 20;
diam2 = 30;
yspeed = random(1,4);/*i did not want to make this speed uniform
depending on the amount of blank() used*/
}

void display(){
noStroke();
fill(99,196,240,85);
ellipse (xpos, ypos, diam1, diam2); /*This shows the format for the circles
so I dont have to type it continuously*/
}

void move(){
ypos = ypos + yspeed;
if (ypos > height){
ypos = 0;
}
}
}
Stars:
class Star{
float xpos;
float ypos;
float diam1;
float diam2;

Star() {
xpos = random(width);
ypos = random(height);
diam1 = 10;
diam2 = 10;
}

void display(){
noStroke();
fill(255);
ellipse (xpos, ypos, diam1, diam2); /*This shows the format for the circles
so I dont have to type it continuously*/
}
}
Today’s presentation of our final projects marked the end of the TechHire—OpenCode vestibule. Each Participant was allotted seven minutes to present there project. These seven minutes included setting our laptops to the projector, talking through our code, running our code, and lastly a Q&A session. I am generally a great public speaker, but Friday had my nerves rattled. I felt the pressure. My presentation could make or break a possible invitation to the full TechHire—OpenCode program. I felt the pressure. After setting up my laptop, my anxiety steadily receded. I was able to talk through my code in a manner that showed my understanding and dedication to the project. I was surprised to hear subtle gasps when I showed the interactivity portion of my sketch. There was less than a minute left for Q&A and I was able to still answer two questions without gabbling. My supportive classmates gave me a round of applause, which erased all doubt about the quality of my project.
These past two weeks have taught me so much in the world of web development. I learned about job placement and techniques in coding. The most important lesson I learned during my time with TechHire—Open Code is that there is no limit to what I can accomplish if I put my mind to it.

 Tell me about it Grandmother Willow…


 Kurt also introduced us to a color picker app called
  Kurt, our new instructor eased the class into a new curriculum. We would leave Java momentarily and begin learning HTML and CSS. Luckily, I had completed most of the tutorials on these languages provided by
  Our first lesson was on file paths and their great importance. It is crucial to organize your file paths together because your pages will be linked to one another. Atom does a very good job of displaying the file path and showing how folders and files nested or linked to one another.

 My patience, or lack there of, was soon rewarded with information regarding the TechHire–OpenCode cohort with Software Guild.There was no formal email. There was just a notification on my phone from the Slack application., a little orange bubble at the corner of an icon.I was added to a new slack channel. This channel was for the third cohort of the program. I was accepted into Laguardia TechHire–OpenCode with Software Guild. Though it wasn’t the formal acceptance I was hoping for, my excitement was not dulled! The formalities came later that day, so I was really in.


